- Afrikaans
- Albanian
- Amharic
- Arabic
- Armenian
- Azerbaijani
- Basque
- Belarusian
- Bengali
- Bosnian
- Bulgarian
- Catalan
- Cebuano
- chinese_simplified
- chinese_traditional
- Corsican
- Croatian
- Czech
- Danish
- Dutch
- English
- Esperanto
- Estonian
- Finnish
- French
- Frisian
- Galician
- Georgian
- German
- Greek
- Gujarati
- haitian_creole
- hausa
- hawaiian
- Hebrew
- Hindi
- Miao
- Hungarian
- Icelandic
- igbo
- Indonesian
- irish
- Italian
- Japanese
- Javanese
- Kannada
- kazakh
- Khmer
- Rwandese
- Korean
- Kurdish
- Kyrgyz
- Lao
- Latin
- Latvian
- Lithuanian
- Luxembourgish
- Macedonian
- Malgashi
- Malay
- Malayalam
- Maltese
- Maori
- Marathi
- Mongolian
- Myanmar
- Nepali
- Norwegian
- Norwegian
- Occitan
- Pashto
- Persian
- Polish
- Portuguese
- Punjabi
- Romanian
- Russian
- Samoan
- scottish-gaelic
- Serbian
- Sesotho
- Shona
- Sindhi
- Sinhala
- Slovak
- Slovenian
- Somali
- Spanish
- Sundanese
- Swahili
- Swedish
- Tagalog
- Tajik
- Tamil
- Tatar
- Telugu
- Thai
- Turkish
- Turkmen
- Ukrainian
- Urdu
- Uighur
- Uzbek
- Vietnamese
- Welsh
- Bantu
- Yiddish
- Yoruba
- Zulu
Effective Methods for Drying Cannabis Using Paper Bags for Optimal Storage
Drying Cannabis in a Paper Bag A Simple and Effective Method
When it comes to cultivating cannabis, one of the most crucial steps in the post-harvest process is drying. Proper drying ensures that the buds retain their potency, flavor, and aroma while preventing mold growth. Among the various drying methods available, using a paper bag has gained popularity due to its simplicity and effectiveness. In this article, we'll explore the benefits of drying cannabis in a paper bag and provide a step-by-step guide on how to do it.
Why Choose a Paper Bag?
Using a paper bag for drying cannabis offers several advantages over other drying methods such as hanging or using a dehydrator. One of the primary benefits is that paper bags provide an ideal environment for slow and even drying. The breathable material allows moisture to escape while protecting the buds from excessive light and external contaminants. Additionally, paper bags are inexpensive, readily available, and easy to use, making them an accessible option for both novice and seasoned growers.
Preparing for the Drying Process
Before you begin drying your cannabis in a paper bag, it's essential to prepare your harvested buds. Start by trimming away excess leaves and cutting the branches into manageable sizes. This not only speeds up the drying process but also enhances the final product's quality. The ideal moisture content for cannabis buds before drying should be around 60-70%. Buds that are too wet may lead to mold growth, while overly dry buds can lose potency and flavor.
Step-by-Step Guide to Drying Cannabis in a Paper Bag
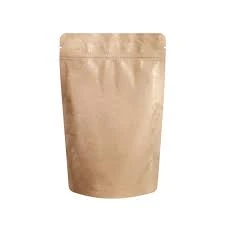
1. Choose the Right Paper Bag Opt for plain, unbleached paper bags that are free of dyes and chemicals. Grocery bags or those specifically designed for herb drying work well. Avoid plastic bags, as they trap moisture and can create an environment conducive to mold.
drying cannabis in paper bag

2. Fill the Bag Place the trimmed cannabis buds into the bag. Be careful not to overcrowd the bag; it’s best to fill it about halfway to allow for adequate airflow. If you have a large harvest, consider using multiple bags.
3. Seal the Bag Fold the top of the bag over to close it, ensuring that it is not airtight. The goal is to create a space that allows humidity to escape while preventing direct light exposure.
4. Monitor Conditions Place the paper bag in a dark, cool, and well-ventilated area. Ideal drying conditions have a temperature between 60-70°F (15-21°C) with a humidity level around 45-55%. Check the bag regularly to ensure that the buds are drying evenly.
5. Check for Readiness After about 5 to 10 days, it’s time to check the buds. They should feel dry to the touch but still slightly sticky inside. You can do a “snap” test by attempting to break a small branch; it should snap rather than bend. This indicates that the drying process is complete.
6. Cure for Best Results Once your buds are dried to the desired level, it’s time to cure them. Transfer the dried cannabis to glass jars, filling each jar about 70% full. Seal the jars and open them daily for about 10-15 minutes during the first two weeks to allow fresh air in and moisture to escape. This curing process enhances the flavor and overall quality of your cannabis.
Conclusion
Drying cannabis in a paper bag is an effective and straightforward method that many growers swear by. By following the steps outlined above, you can ensure that your cannabis maintains its quality, flavor, and potency. Always remember that proper drying and curing are as important as the growing process itself. Take the time to do it right, and you'll be rewarded with a satisfying product that you can enjoy for weeks to come. Happy growing!


